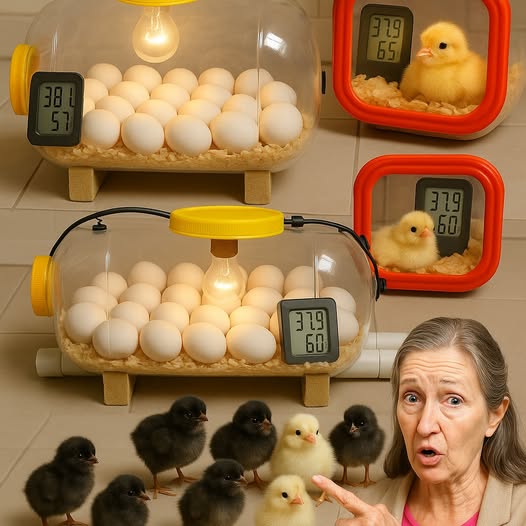
Introduction: From Bottle to Brooder — The Ultimate DIY Egg Incubator Guide

Have you ever dreamed of hatching your own chicks at home but thought incubators were too expensive? Here’s some good news: you can build a homemade egg incubator using a simple water bottle! Whether you’re a backyard farmer, school science teacher, homesteader, or curious parent, this guide offers an affordable, effective, and easy-to-follow method that brings your eggs to life—literally.
Commercial incubators can cost anywhere from $60 to $300+, but this DIY method can be made for under $10, using items you already have at home. Beyond saving money, you’ll gain hands-on experience, empower your children or students, and discover the joy of sustainable living.
In this detailed, SEO-optimized guide, you’ll learn exactly how to build a homemade egg incubator with a water bottle, backed by science, practical strategies, and expert tips. Let’s dive in.
Why Build a DIY Egg Incubator?
Before we build, let’s understand the “why.” There are several key reasons to go the DIY route:
- 💰 Cost Savings – Build for less than 10% the price of store-bought incubators
- 🧠 Educational Value – Great for science projects and life cycle education
- 🌿 Sustainability – Reuse plastic bottles and reduce waste
- 🐣 Customization – Adjust humidity, heat, and airflow to your liking
- 🧡 Satisfaction – Watching life emerge from your own handmade creation is priceless
Now, let’s build your incubator, one step at a time.
Materials You’ll Need
All items are either household items or easy to find at local stores:
| Item | Purpose |
|---|---|
| 1. 2-liter plastic water bottle | Main incubator chamber |
| 2. Small desk lamp with 15-25 watt bulb | Heat source |
| 3. Digital thermometer/hygrometer | Monitoring temperature and humidity |
| 4. Plastic wrap or cling film | Lid covering |
| 5. Small sponge or cotton balls | Humidity control |
| 6. Scissors or utility knife | Cutting bottle |
| 7. Tape or glue | Sealing edges |
| 8. Egg tray or padding | Holding eggs gently |
Step-by-Step Instructions to Build Your Water Bottle Incubator
Step 1: Cut the Bottle
Carefully cut your 2-liter bottle horizontally about ⅔ up from the base. This allows you to create a lid and a base that fits together snugly. Smooth out any sharp edges with tape.
Step 2: Create a Ventilation Hole
Puncture a small air hole on each side of the bottle near the base (about 1 cm in diameter). This encourages air circulation and mimics natural conditions.
Step 3: Install the Heat Source
Position the desk lamp 3–5 inches away from the bottle’s side or top, angled downward. Avoid placing it directly on the bottle to prevent overheating or melting. The heat from the lamp will act as the “mother hen.”
Pro Tip: Use a 15-watt incandescent bulb for 1–3 eggs. For 4–6 eggs, increase to 25 watts but monitor temperature carefully.
Step 4: Add Humidity
Place a damp sponge or cotton ball inside a small container at the bottom of the bottle. This maintains the necessary 50–65% humidity during the incubation period. Adjust daily.
Step 5: Place the Eggs
Use a soft cloth or egg tray to place the eggs inside the bottle. Keep them slightly tilted and turn the eggs 3–5 times daily to mimic how a hen would naturally rotate them.
Step 6: Cover and Monitor
Use cling film or plastic wrap to cover the top of the incubator (the bottle lid). This helps trap heat while still allowing light penetration. Use a digital thermometer/hygrometer inserted through a small slit in the wrap to check readings twice a day.
Key Conditions for Successful Hatching
To hatch successfully, eggs must stay within very specific temperature and humidity ranges for 21 days. Here’s your cheat sheet:
| Factor | Ideal Range | Notes |
|---|---|---|
| Temperature | 99°F – 102°F (37.2°C – 38.9°C) | Fluctuations can cause embryo death |
| Humidity (Days 1–18) | 50% – 55% | Too low = chicks get stuck; too high = drowning risk |
| Humidity (Days 19–21) | 65% – 75% | Lockdown phase — stop turning eggs |
| Egg Turning | 3–5x/day | Do not turn after day 18 |
Frequently Asked Questions (FAQs)
1. Can I use any water bottle size?
A 2-liter bottle is ideal, but 1.5-liter bottles work for smaller setups. Ensure there’s enough space for air and heat circulation.
2. How long does it take for eggs to hatch?
Most chicken eggs hatch in 21 days. Duck eggs take about 28 days. Temperature deviations can delay or prevent hatching.
3. Do all eggs hatch?
No. Even in commercial incubators, hatch rates vary between 70–90%. In DIY setups, expect around 50–70% with proper care.
4. How do I know if the egg is developing?
Candle the eggs (shine a flashlight through them) around day 7 and 14. Look for vein patterns or movement.
5. What if the temperature goes too high?
Overheating kills embryos. Always keep a thermometer inside and turn off the lamp for short periods if it exceeds 102°F (38.9°C).
Real Results: Why This Method Works
According to poultry science studies, the embryo survival rate decreases by 15% for every 1°F above 103°F. That’s why consistent monitoring is vital.
Homesteaders have reported hatching rates as high as 80% using DIY water bottle incubators with minor upgrades like cardboard insulation and blackout cloth to stabilize temperatures.
Bonus: Expert Tips for Higher Hatch Rates
- Use fertilized eggs from healthy hens within 7 days of laying
- Add cardboard insulation around the incubator for better heat retention
- Keep the incubator in a draft-free room
- Add a second water bottle with warm water nearby to act as a heat sink
- Mark eggs with an “X” on one side and “O” on the other to track rotation
Common Mistakes to Avoid
| Mistake | Impact |
|---|---|
| Using unfertilized store-bought eggs | Won’t hatch |
| Skipping egg turning | Chick sticks to shell wall |
| No humidity control | Dehydration or drowning |
| Overheating | Immediate embryo death |
| Forgetting to monitor | Risk of total hatch failure |
What Sets This Method Apart?
✅ Inexpensive: Build under $10
✅ Eco-friendly: Recycles common plastics
✅ Compact: Small and easy to manage
✅ Customizable: Can be upgraded with fans, sensors, insulation
✅ Educational: Ideal for science projects and STEM learning
Conclusion: Hatch Life, Not Just Eggs
Creating a homemade egg incubator using a water bottle is more than a DIY project—it’s a gateway to learning, sustainability, and self-reliance. With just a few basic materials and some care, you can witness the miracle of life from the comfort of your own home.
Whether you’re raising backyard chickens, teaching biology, or simply love hands-on experiments, this incubator method is proven, powerful, and surprisingly simple.
Start small. Start smart. And remember—from one bottle, many lives can hatch.


